The following example shows the creation of a simple Alexa application (Skill) using the ‘Alexa Developer Console’ and ‘AWS Lambda’.
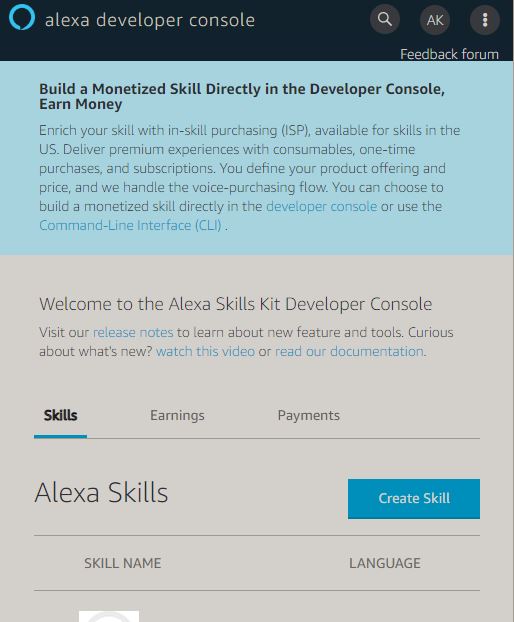
Alexa Developer Console
The ‘Alexa Developer Console’ helps us create the so-called ‘Interaction Model’. This model is used to describe the desired application and define the sentences and parameters to which Alexa should later respond. The programming of the logic is NOT done in the Developer Console but in AWS Lambda.
The ‘Interaction Model’ for a simple application is composed as follows:
| Invocation | For self-created skills, you need to say the application name beforehand, e.g., “Alexa, start ’name of the application’”. ‘Invocation’ refers to this name. |
|---|---|
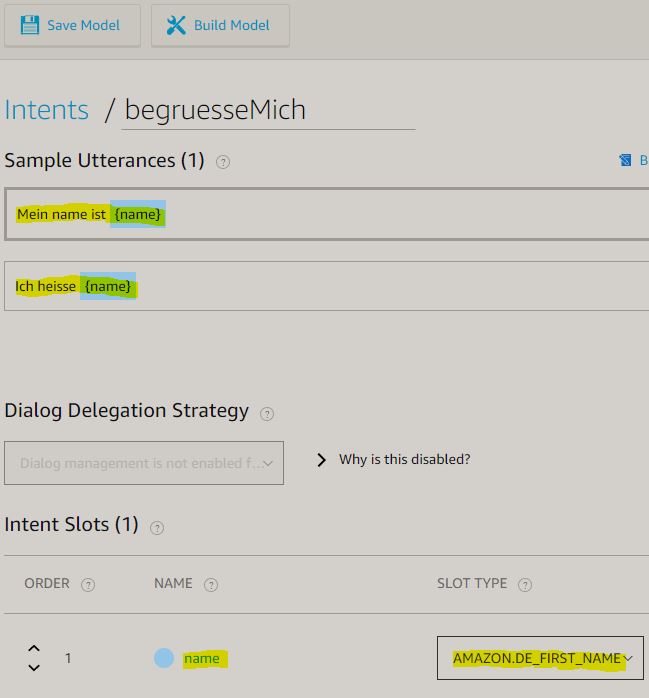
| Intents, Samples & Slots | Intents Alexa provides certain functions such as AMAZON.StopIntent. This function is invoked as soon as the user says “Alexa, stop”. In addition to the existing intents, we also have the option to define custom functions that respond to certain utterances we defined earlier. Samples The previously defined utterances that lead to a function call are called samples or ‘Sample Utterances’, e.g. the statement “My name is Aaron” can trigger a function that then greets me by name. Slots The previously defined sentences are static. Slots are used to dynamically replace individual passages within the static sentences, i.e. with placeholders, e.g. “My name is {name}”. |
| Slot Types | Each slot is of a specific type, e.g. AMAZON.FIRST_NAME, AMAZON.Room, etc. |
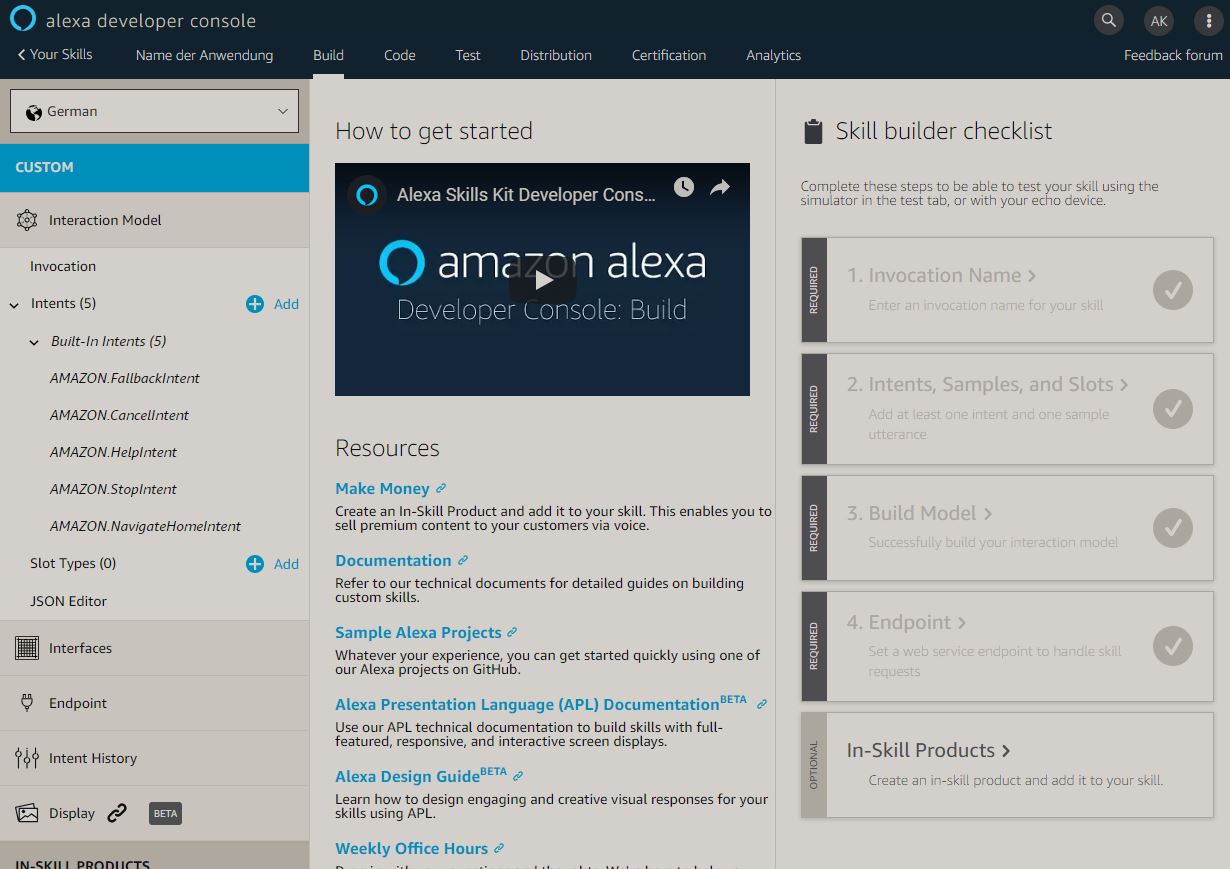
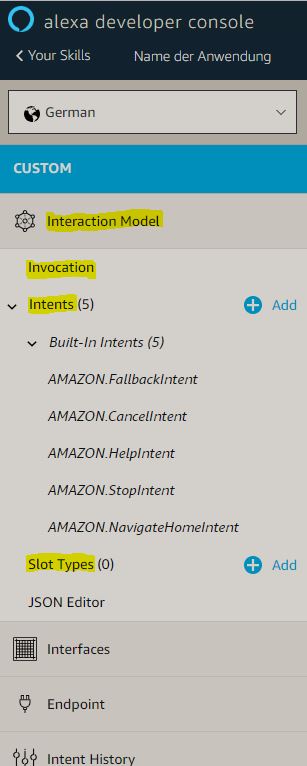
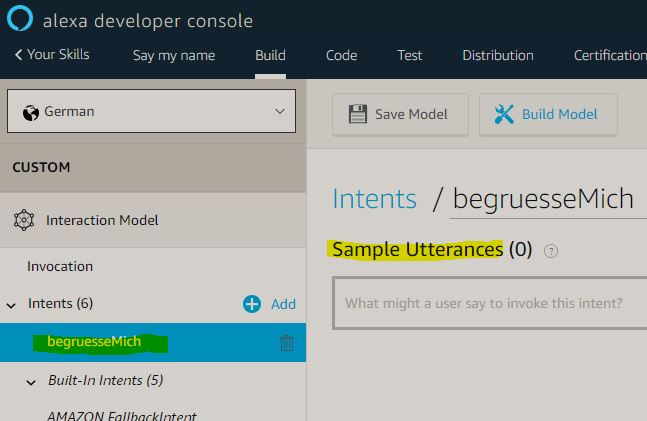
The ‘Interaction Model’ mentioned above can be configured on the left side:
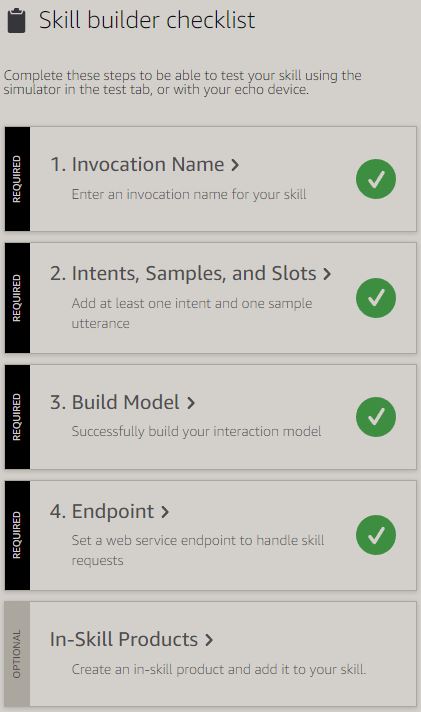
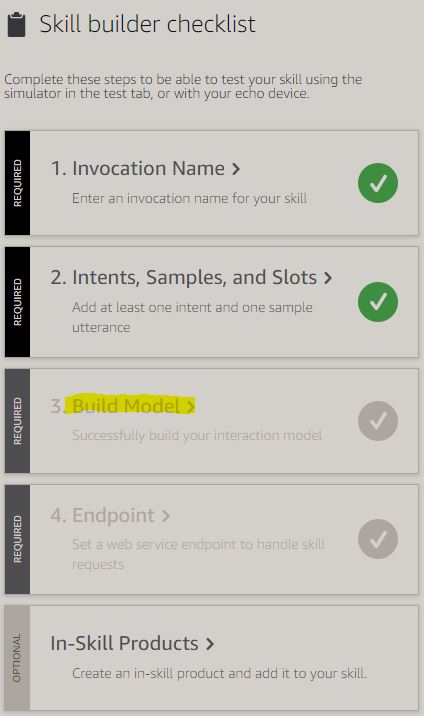
On the right side there is a checkbox that shows us at any time whether we have already configured all features of the application, e.g. creating an intent, etc.

As soon as the ‘Interaction Model’ is filled out correctly, the corresponding markers turn green:
Creating an Application

Name of the application, language, and selection of a ‘Custom’ application:
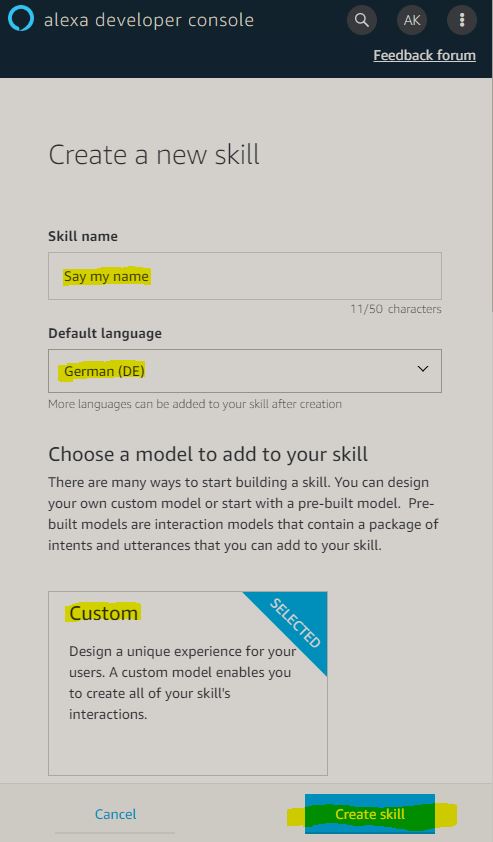
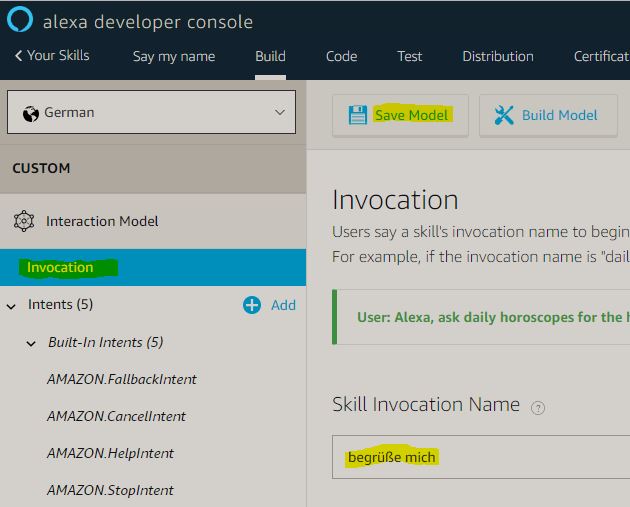
The application should be started with “Alexa, start greet me”:
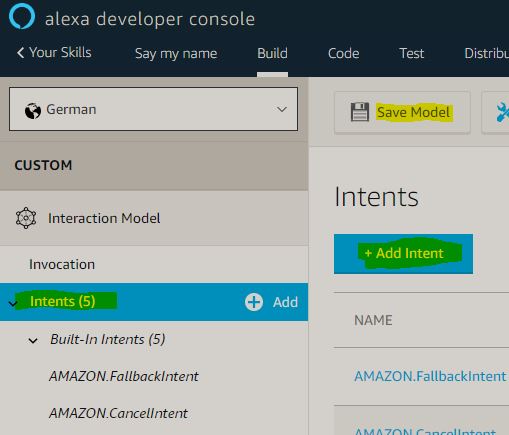
Next we specify the name of the function that is called by ‘greet me’:
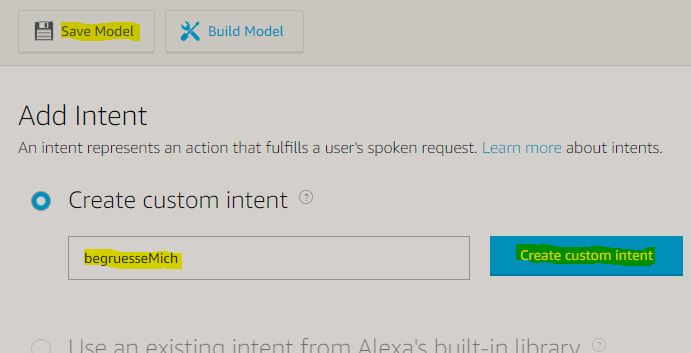
I call the function, which will be implemented later, ‘begruesseMich’:
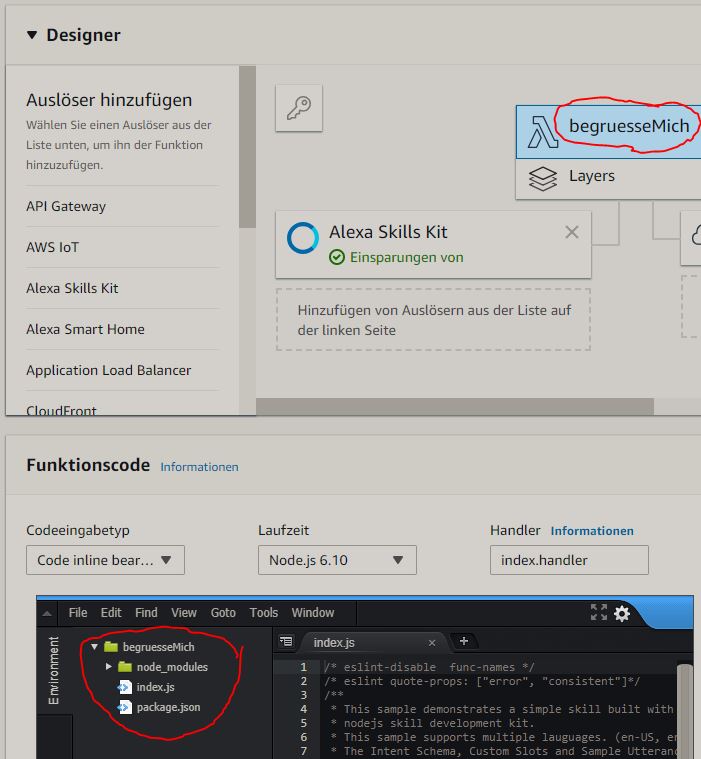
The desired function is then displayed on the left side:
Since the application will first ask me for my name and should respond to an answer, we can specify the different types of responses on the right side, i.e. in this case the application expects these answers.
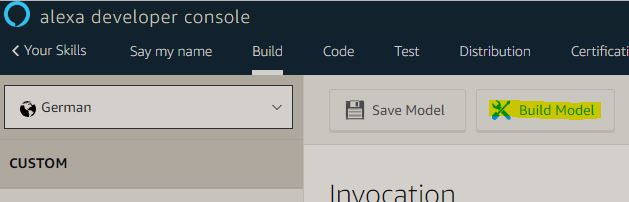
Next the application must be built:
Before we configure the last section (Endpoints), let’s look at how the high-level communication takes place:

AWS Lambda
Lambda is a product from the Amazon Web Services (AWS) family and offers us, among other things, the ability to write and execute the desired functions using a web-based IDE. The execution is triggered by a trigger, e.g. by the Alexa Skill.
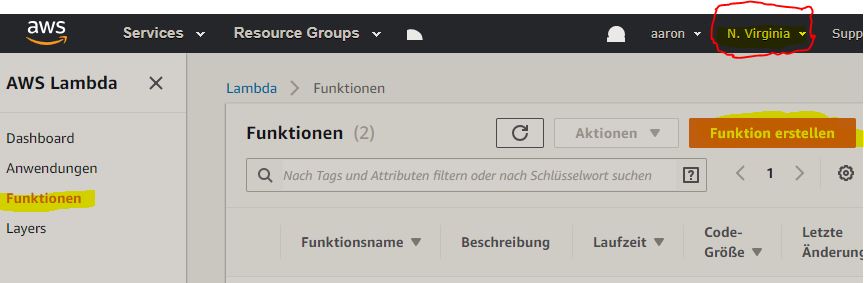
A Lambda function is created as follows:
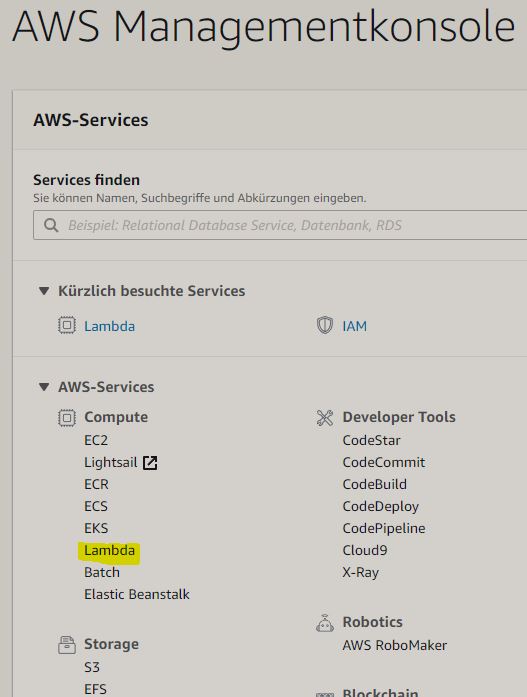
After calling Lambda, we can create a new function as follows. The region must be set to ‘N. Virginia’.
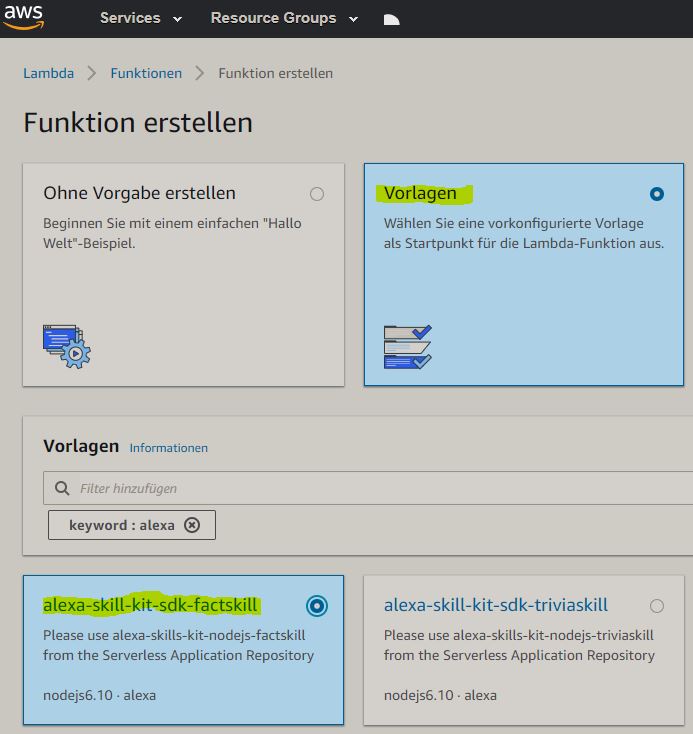
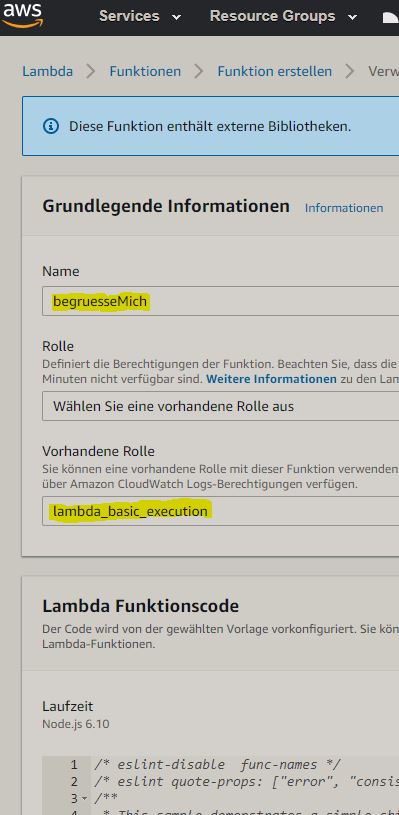
Next we can define further details of the function, e.g. the name of the function and the desired programming language.
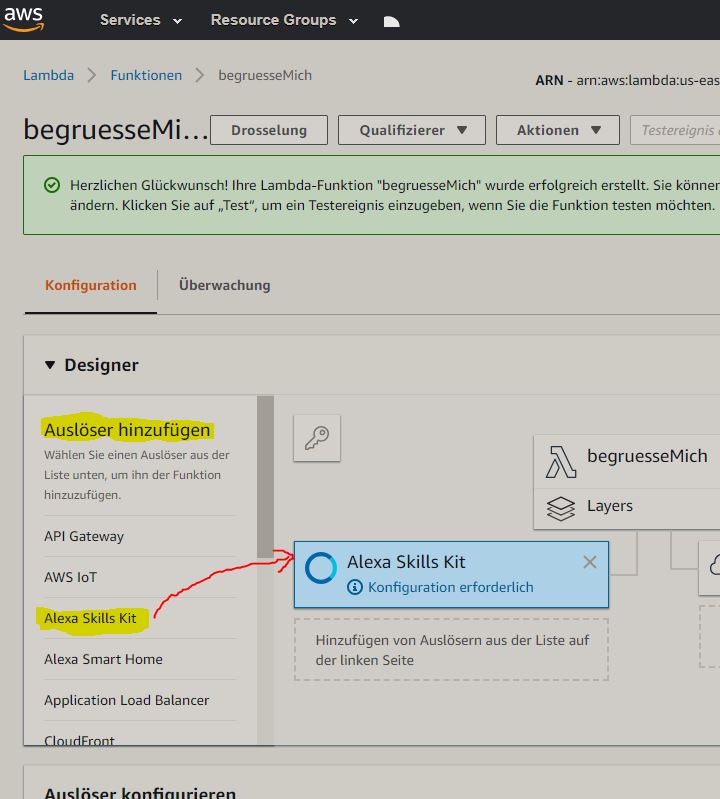
In the next step we tell the function what should trigger it. In our case, we want Alexa to call the function (Trigger).
Further down, we can restrict the invocation to a specific application using an ID. That means only the application with the ID stored here is allowed to call this function.
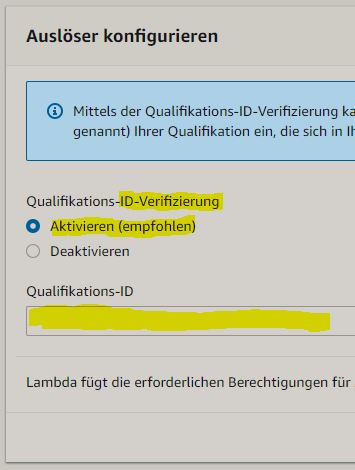
The Qualification ID, i.e. Skill ID, can be found within the ‘Alexa Developer Console’:
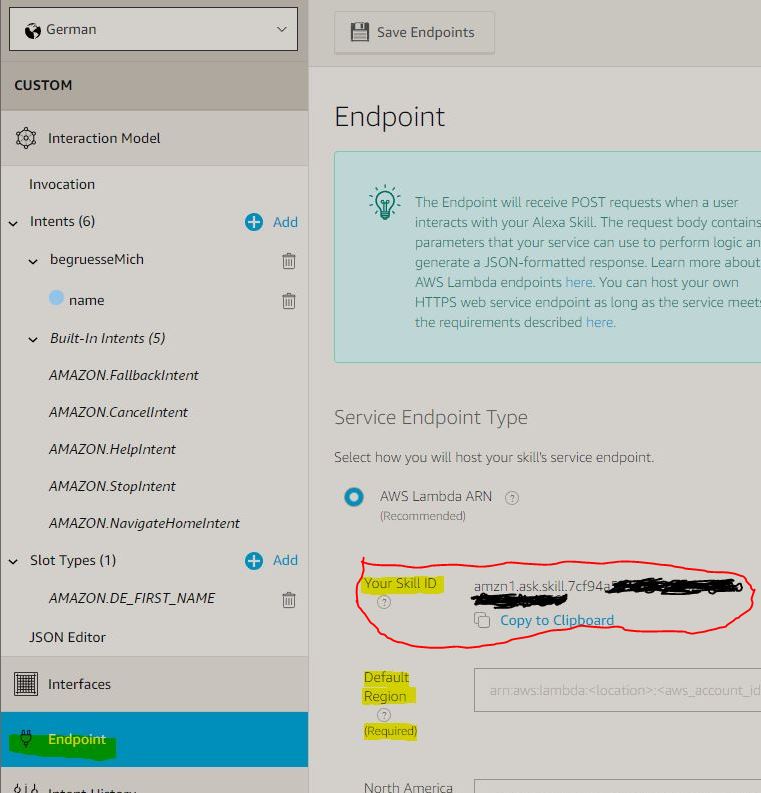
Additionally, under ‘Default Region’ we must specify which function in which region is responsible for processing. We obtain the ‘Default Region’ ID at the following location:

In the last step the skill can be built. To do this, just select ‘Build Model’:
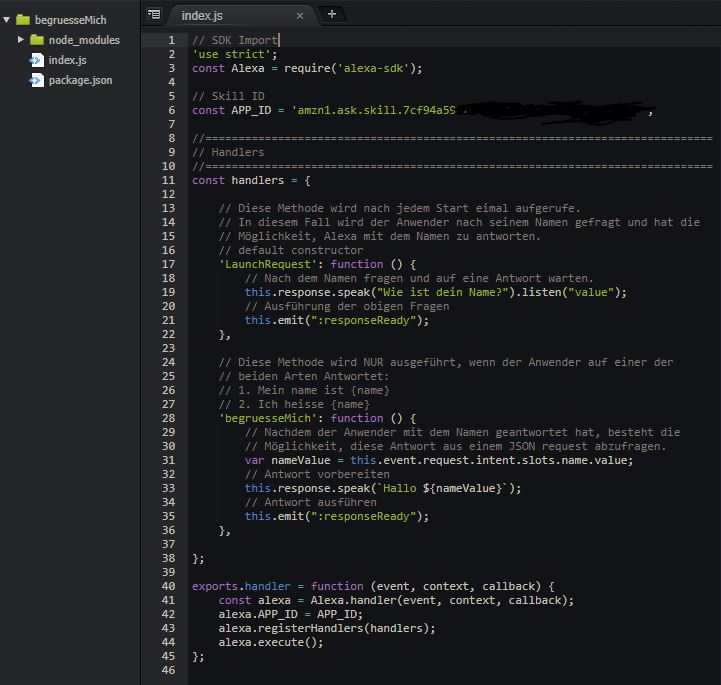
Within Lambda, by selecting the function ‘begruesseMich’ we get access to the web-based IDE. Because we previously used the template ‘alexa-skill-kit-sdk-factskill’, all required libraries have already been imported:
The function is structured as follows:
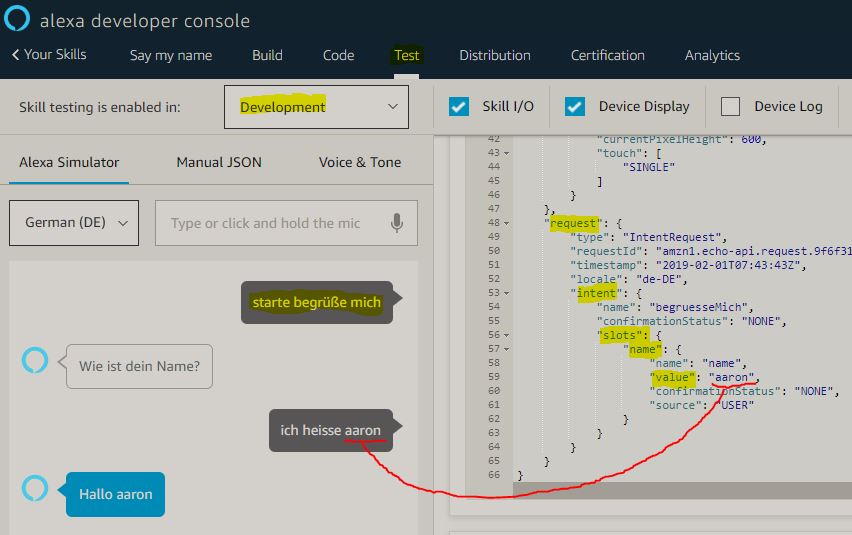
Afterwards, the application can be tested online under ‘Test’:
Practical Example
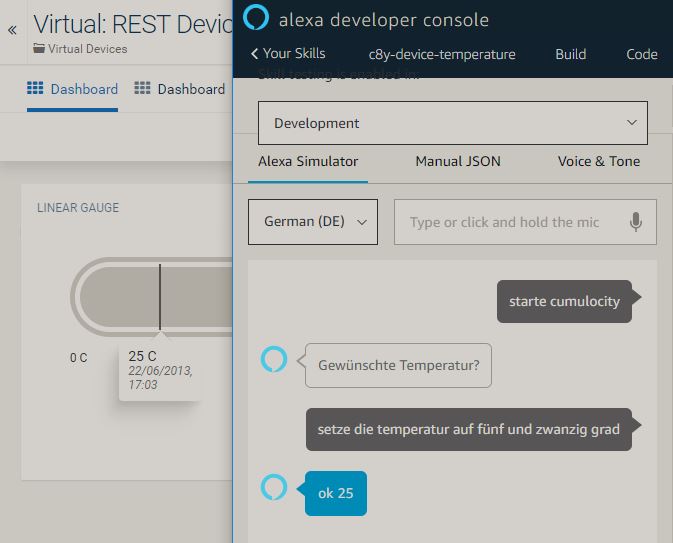
In this example I want to instruct the Cumulocity IoT platform to change the temperature of a device.
var unirest = require(‘unirest’);
unirest.post(‘http://tenant.cumulocity.com/measurement/measurements/').headers({ ‘Accept’ : ‘application/vnd.com.nsn.cumulocity.measurement+json’, ‘Content-Type’ : ‘application/json’, ‘Authorization’ : ‘Basic WEY………………….FyISEy’ }).send({ “c8y_TemperatureMeasurement”: { “T”: { “value”: 10, “unit”: “C” } }, “time”:“2013-06-22T17:03:14.000+02:00”, “source”: { “id”:“4473883” }, “type”: “c8y_TemperatureMeasurement” }).end(function(response) { console.log(response.body); });
As you can see here, I want to use the external library ‘Unirest’ for my purpose.
To use the library within AWS Lambda, proceed as follows:
- Install the required libraries locally
- Code adjustment (index.js)
- Pack the code and the libs into a *.zip
- Upload the *.zip file (function). When uploading, the function and all existing libraries are replaced. Therefore, we must also upload the libraries.
The installation of the packages is carried out as follows:
- npm install alexa-sdk
- npm install unirest
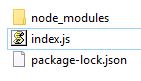
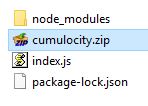
After installing the npm packages, the required dependencies can be found in the ’node_modules’ folder.
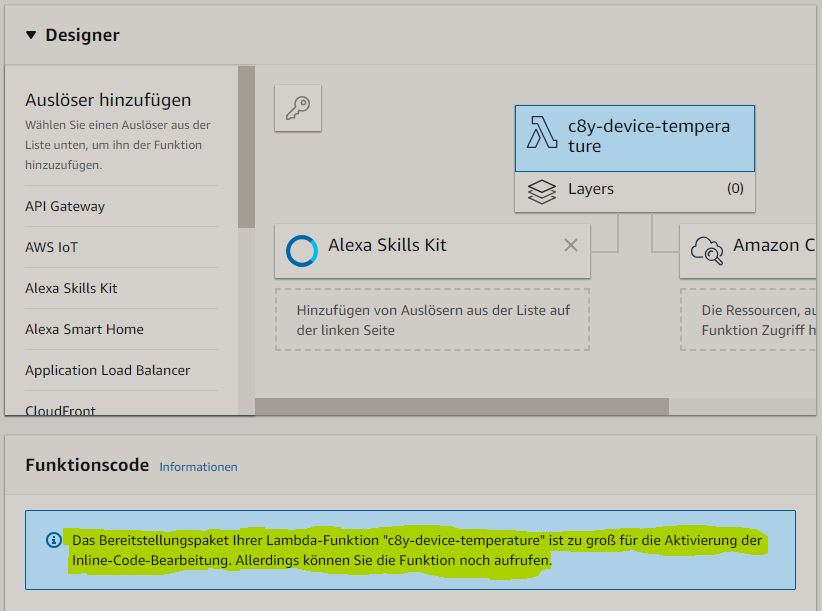
However, due to the import of the two external libraries, the deployment package becomes so large that you can no longer use the IDE, therefore I will continue working at this point with a standalone IDE.
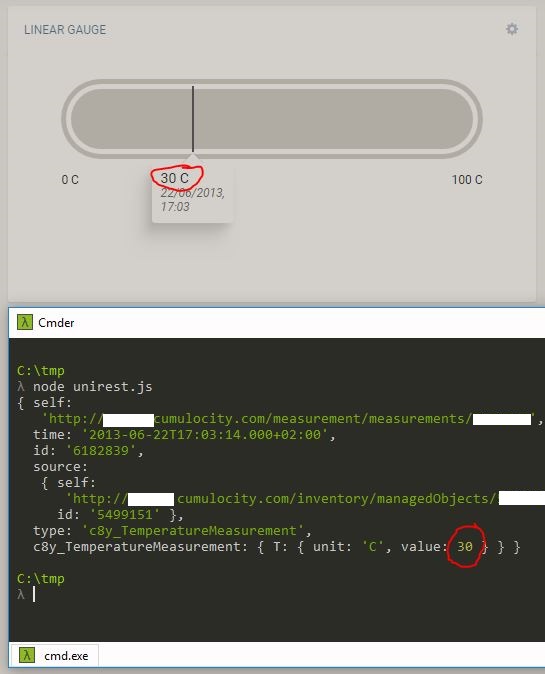
Before we import the script and dependencies into AWS Lambda, we will test the code locally once.
Since the local execution worked, we can zip the contents of the folder once:
We can most easily perform the upload of the *.zip file with the AWS-CLI.
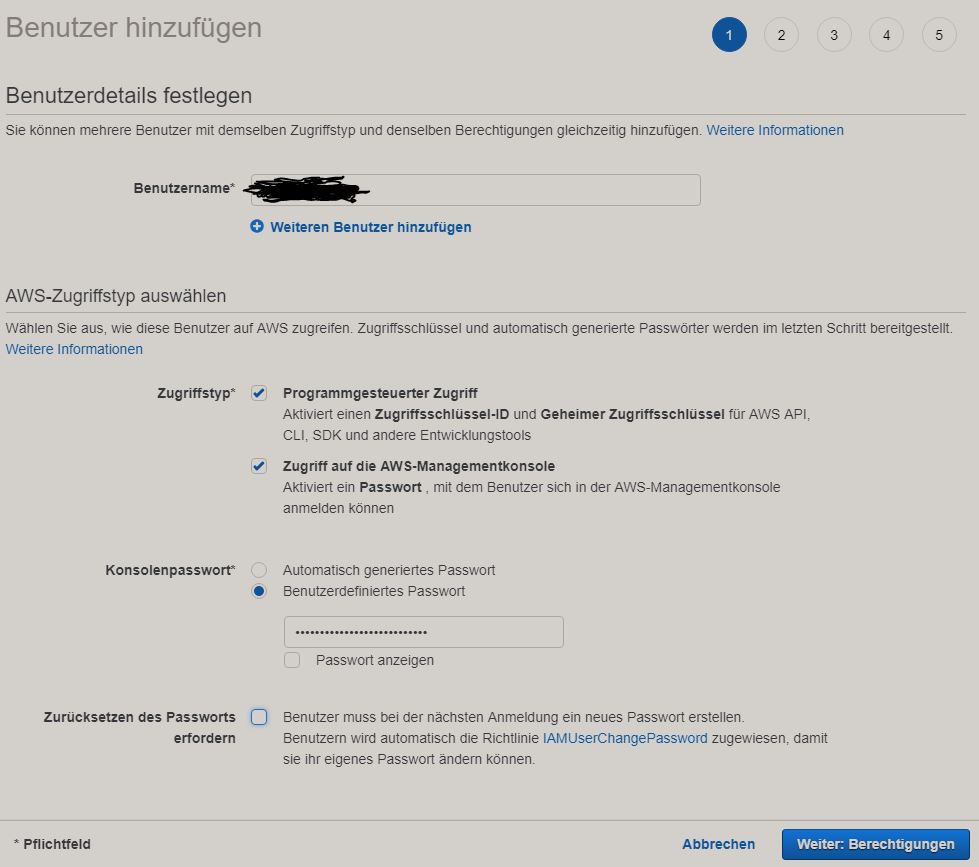
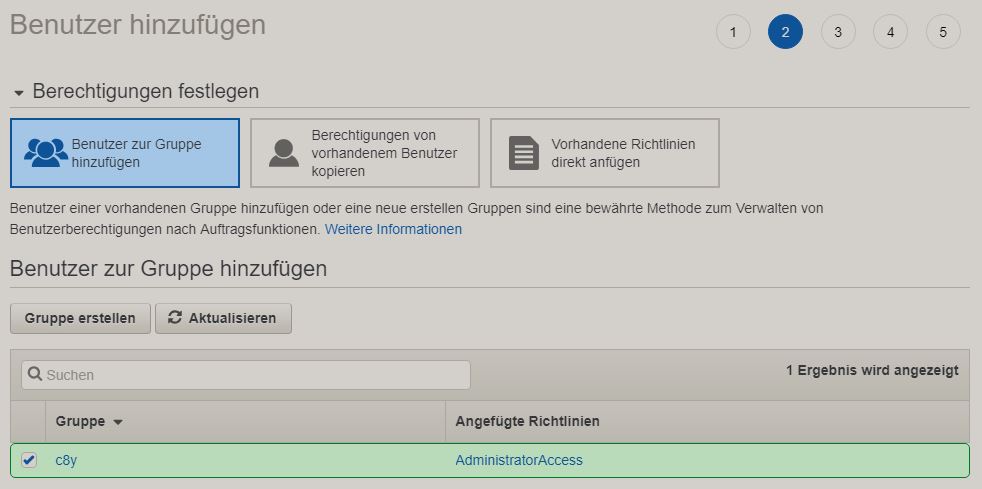
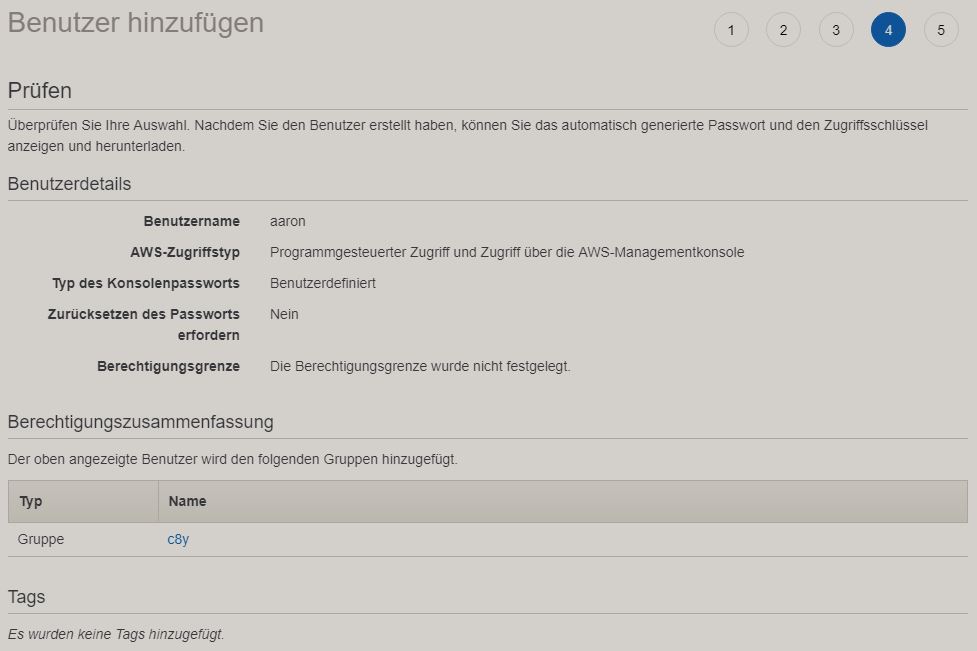
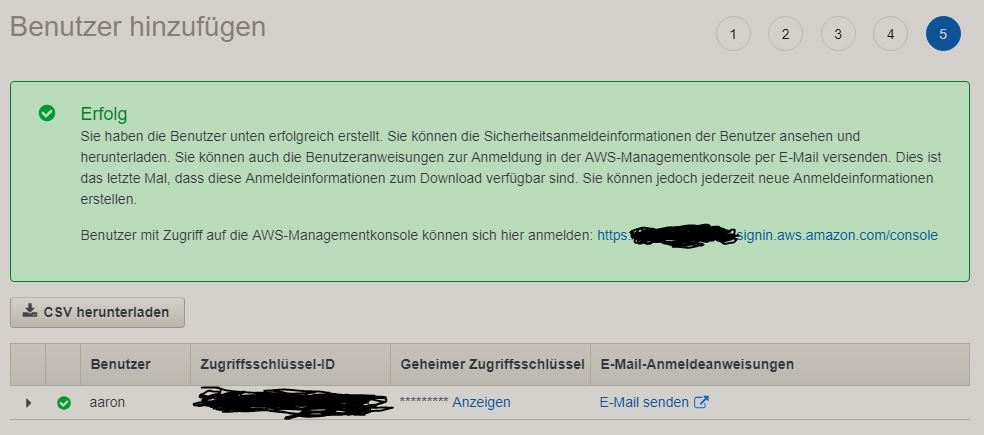
After installing the CLI, we must create an IAM user on the following page as follows (see instructions).
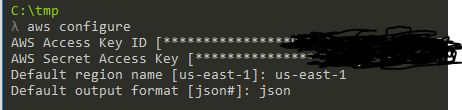
Before uploading, the AWS CLI must be configured using the ‘aws configure’ command:
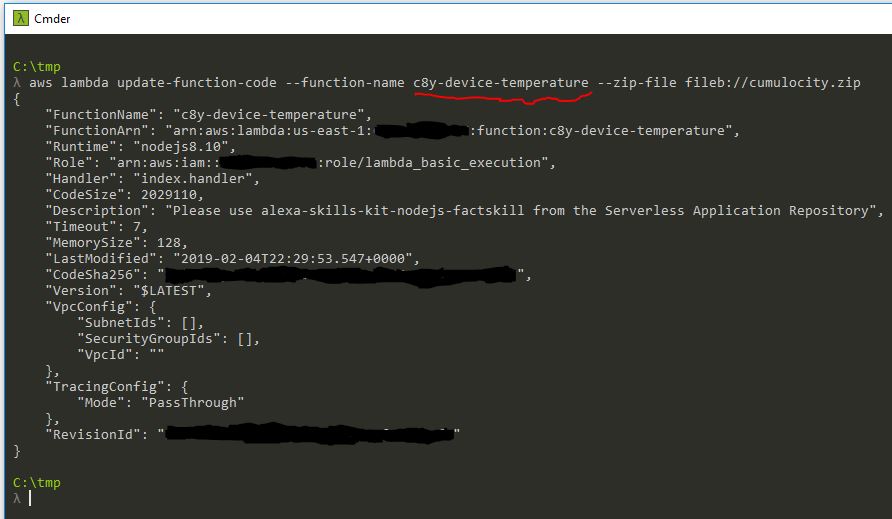
Now we can start the upload as follows. As you can see, the name of the function (c8y-device-temperature) is specified here.
aws lambda update-function-code –function-name c8y-device-temperature –zip-file fileb://cumulocity.zip
Now the code can be executed via Alexa:
index.js Example
‘use strict’; const Alexa = require(‘alexa-sdk’); const APP_ID = ‘xxxxxxx’;
const handlers = { ‘LaunchRequest’: function () { this.response.speak(“Gewünschte Temperatur?”).listen(“value”); this.emit(":responseReady"); }, ‘cumulocity’: function () { var temperature = this.event.request.intent.slots.grad.value; this.response.speak(`ok ${temperature}`); setTemperature(parseInt(temperature,10)); this.emit(":responseReady"); }, };
function setTemperature(temperature) { var unirest = require(‘unirest’);
unirest.post(‘http://xxxxxxx.cumulocity.com/measurement/measurements/').headers({ ‘Accept’ : ‘application/vnd.com.nsn.cumulocity.measurement+json’, ‘Content-Type’ : ‘application/json’, ‘Authorization’ : ‘Basic xxxxxxx’ }).send({ “c8y_TemperatureMeasurement”: { “T”: { “value”: temperature, “unit”: “C” } }, “time”:“2013-06-22T17:03:14.000+02:00”, “source”: { “id”:“5499151” }, “type”: “c8y_TemperatureMeasurement” }).end(function(response) { console.log(response.body); }); }
exports.handler = function (event, context, callback) { const alexa = Alexa.handler(event, context, callback); alexa.APP_ID = APP_ID; alexa.registerHandlers(handlers); alexa.execute(); };