The following topics are covered here:
- Installation of the Cumulocity IoT Platform (C8Y) CLI
- Project creation via the C8Y CLI
- Creation of components
- Setting up navigation (routing)
- Custom branding & using Bootstrap 4 instead of 3 (default)
First of all, we need the Cumulocity (C8Y) Angular CLI (Command Line Interface). We can install the CLI as follows:
npm install -g @c8y/cli
Using the C8Y CLI, a new project can be created as follows:
c8ycli new myApp

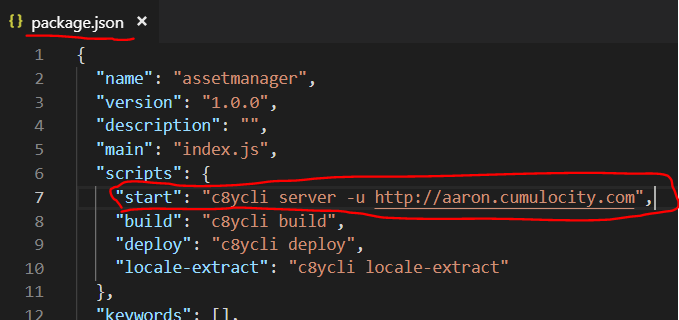
By creating the project with the C8Y CLI, among other things the ‘packages.json’ file was generated, which contains the necessary dependencies.
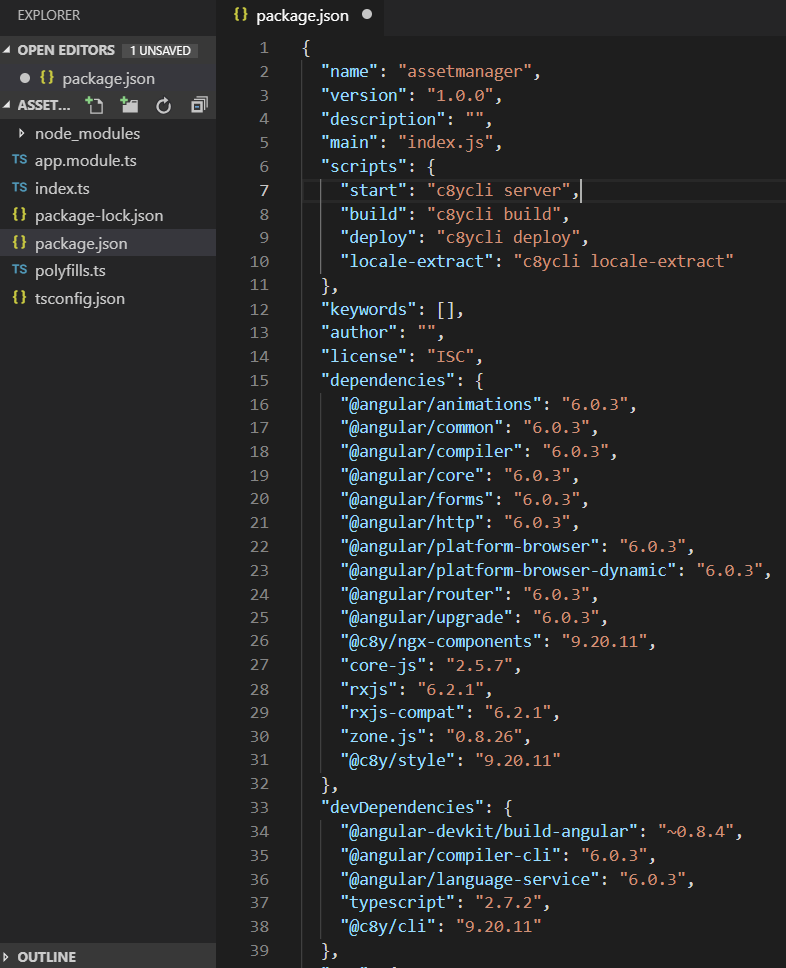
Inside the ‘package.json’, the target tenant must be specified first:
The dependencies can be installed with the following command:
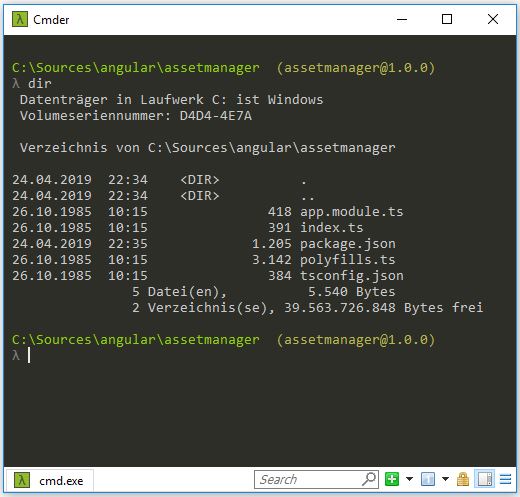
cd assetmanager
npm install
The application can then be started as follows:
npm start
The CLI will start a local server, which we can access at the following URL:
http://localhost:9000/apps/assetmanager/
After navigating to the above URL and entering the user credentials, the user will be redirected to their tenant.
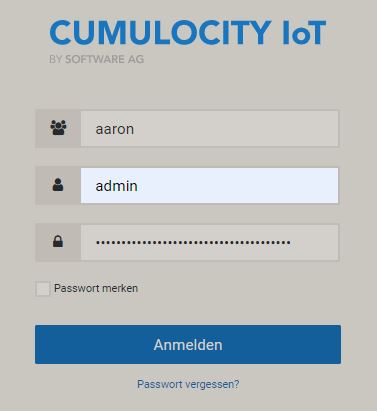
After logging in, you will be redirected to the newly created (empty) application.
![]()
Next, I want to create my first component and display it within the new application. The new ‘HelloWorld’ component (hello.components.ts) is created as follows:
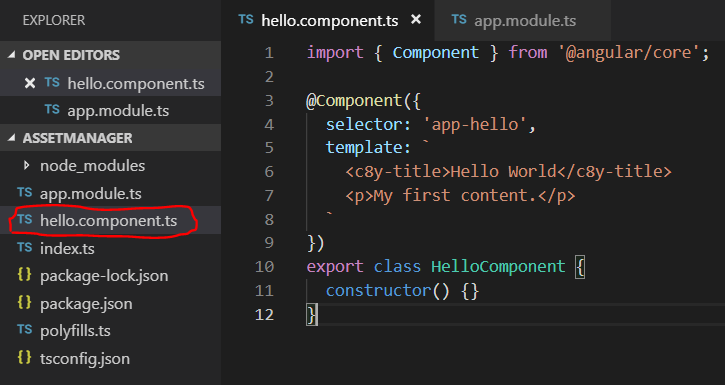
As you can see in the above figure, the content is ‘hard coded’ within the ’template’ section. Later, we can refer to a *.html and *.css file.
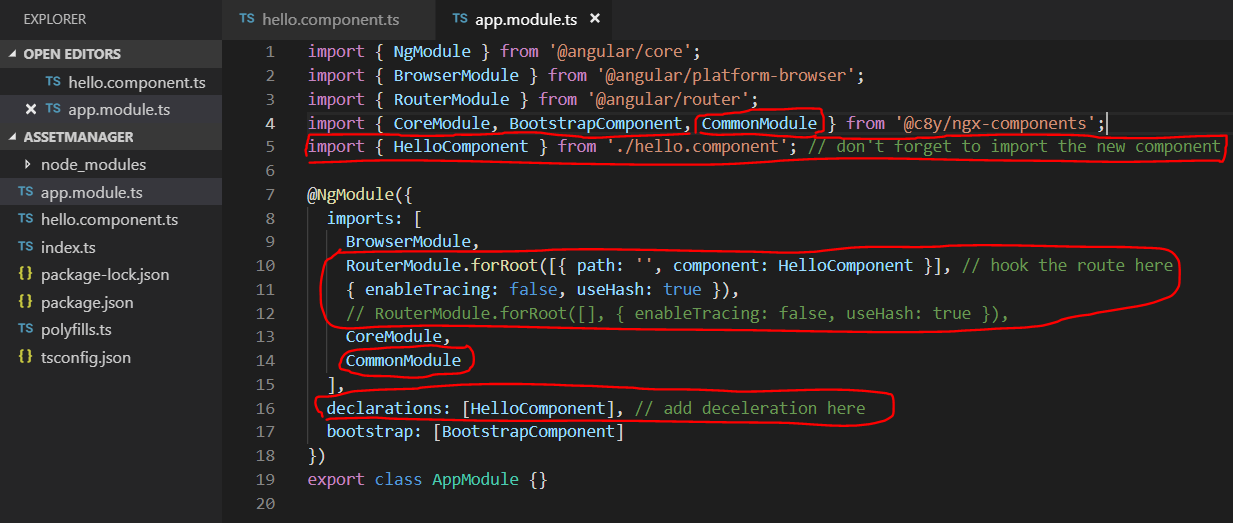
First, the class ‘HelloComponent’ (hello.component.ts) is made visible or registered:
import { HelloComponent } from ‘./hello.component’;
The actual use of the class is declared as follows:
declarations: [HelloComponent]
This directs the application’s ‘root’ invocation to the ‘Hello’ component:
RouterModule.forRoot([{ path: ‘’, component: HelloComponent }]
’enableTracing’ and ‘useHash’ are routing configurations. The description can be found here.
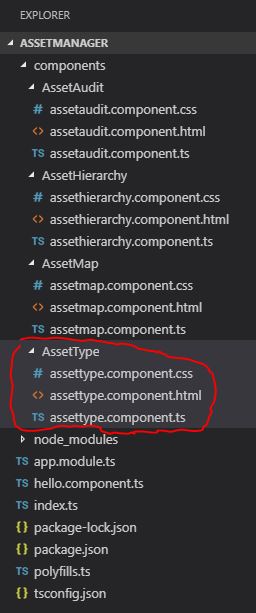
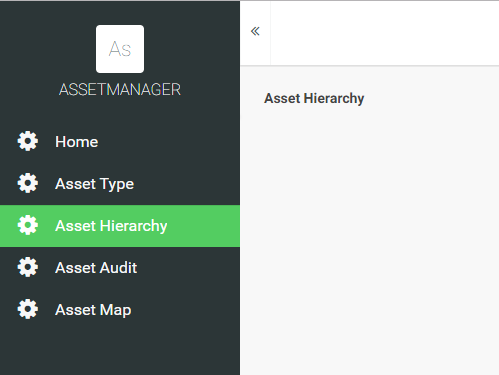
Next, I would like to add and call 4 more components or pages:
1. Asset Type
2. Asset Hierarchy
3. Asset Audit
4. Asset Map
I will describe the creation of the ‘Asset Type’ page. The other pages can be created following the same pattern. All components are placed within the ‘components’ folder. A component, e.g., assettype.component.ts, includes its own HTML & CSS file:
The actual component is created as follows:
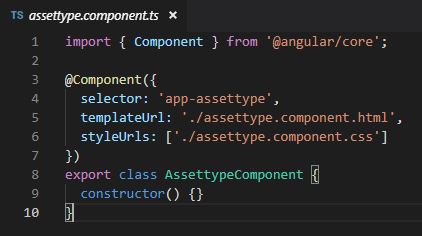
By declaring the ‘selector’, the page can be called within other HTML pages using the tag


To navigate between the individual pages or components, we need to import the ‘Routes’ class and declare the routes.

Afterwards, the individual components can be called via the corresponding URL, e.g.
http://localhost:9000/apps/assetmanager/#/assettype
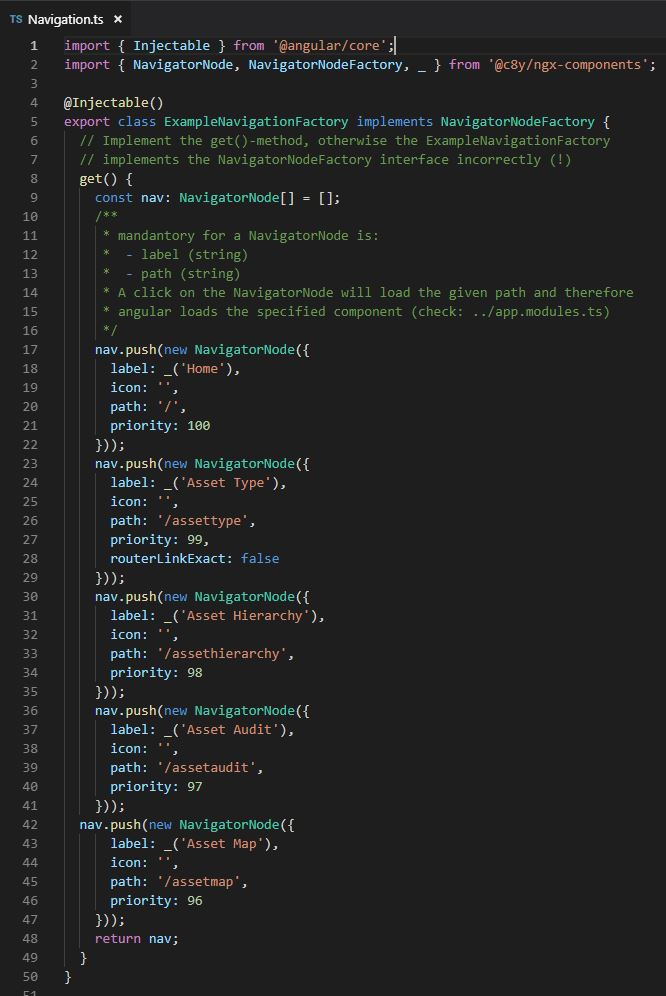
Currently, we can only access the pages by calling the individual URLs. It’s simpler if we create a navigation:
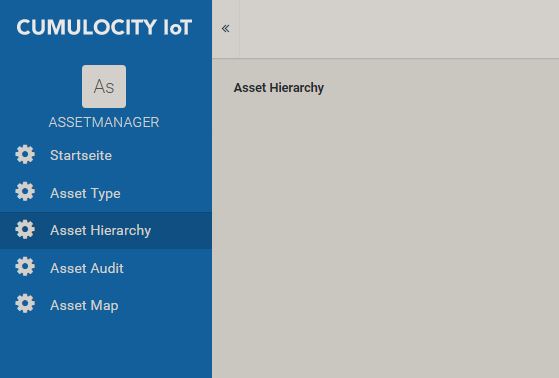
The navigation is defined as follows:
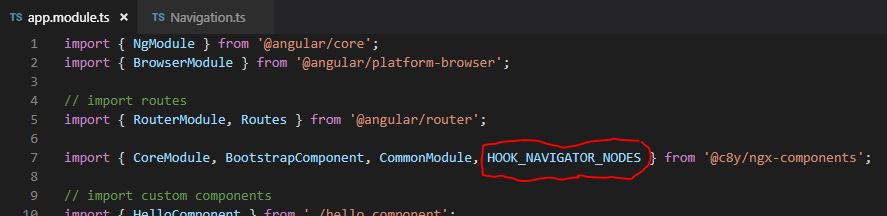
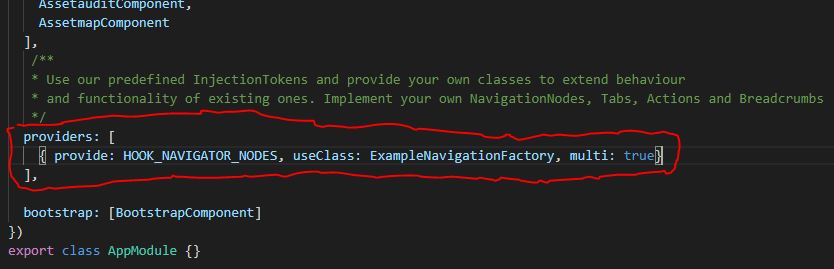
Then the navigation must be enabled within ‘app.module.ts’:
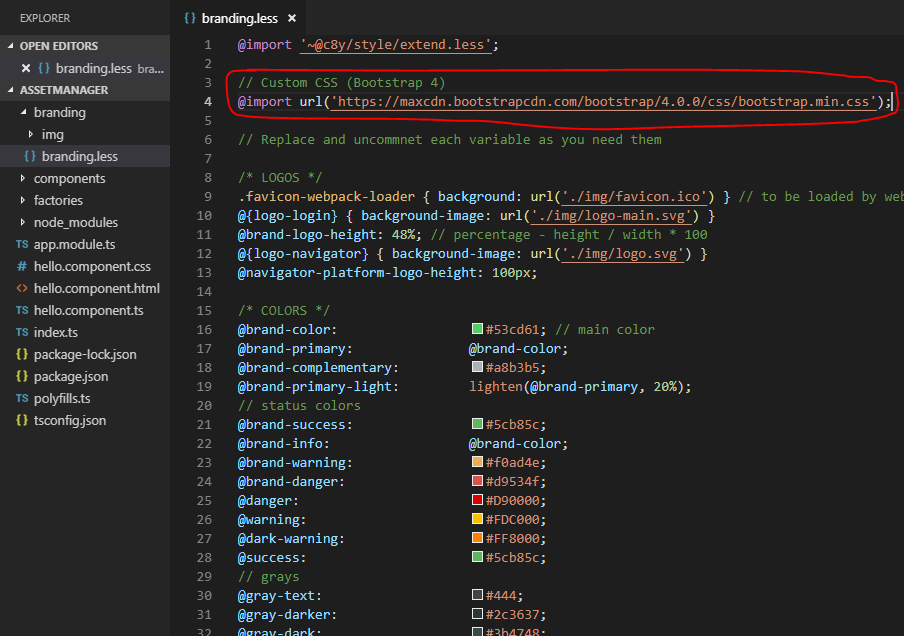
As of May 2019, C8Y supports bootstrap 3. To use a newer version, e.g. Bootstrap 4, we have to either nest the components (i.e., create our own ‘root’ component that includes Bootstrap 4 and call the other components within it using their specific component tags) or create a custom branding and use the new CSS there.
I will choose the second option, so as to describe the creation of a custom branding at the same time.
The branding can can be created within the file ‘branding.less’:
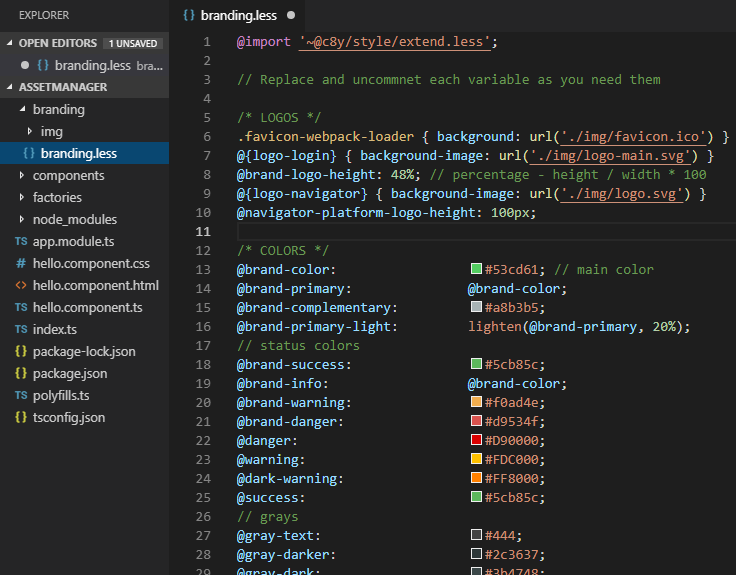
An external CSS file can be imported as follows:
// Custom CSS (Bootstrap 4)
@import url(‘https://maxcdn.bootstrapcdn.com/bootstrap/4.0.0/css/bootstrap.min.css');
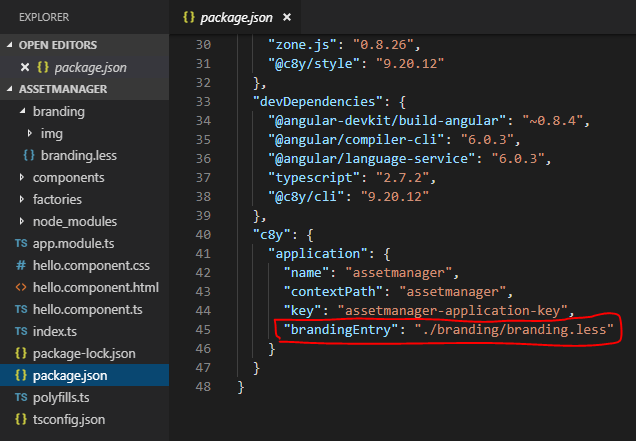
After creating the custom branding, the branding must be registered within ‘package.json’.
The new branding that uses Bootstrap 4 then looks as follows:
.