This guide describes the steps to set up a local OpenClaw instance. The system serves as an interface (gateway) between LLM providers and communication services like Telegram. The installation is carried out containerized using Docker.
Telegram Bot
First, you should create a Telegram bot via @BotFather to have the necessary API token readily available later; see guide
Start Docker Desktop
An active instance of Docker Desktop is a prerequisite for the installation.
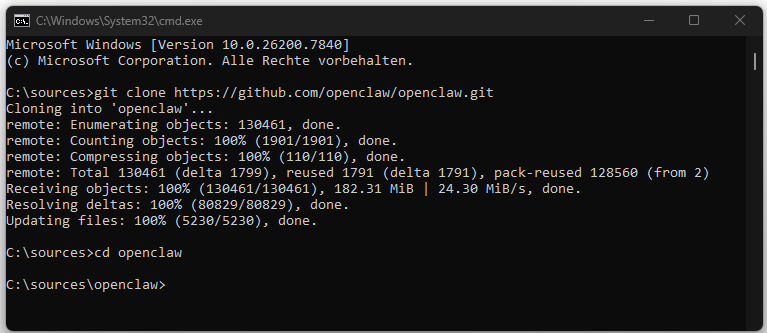
Download OpenClaw from GitHub
In the Windows command prompt, first the source code repository is downloaded. This is done using the command:
git clone https://github.com/openclaw/openclaw.git
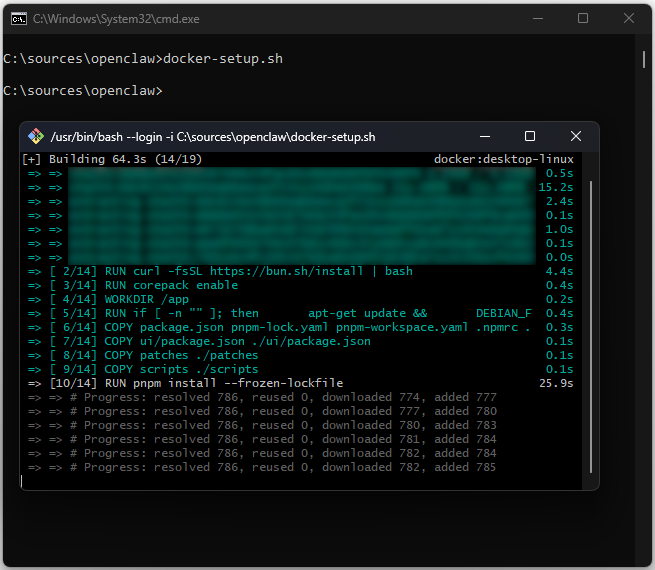
Start Docker Setup
Then change into the newly created directory. In the target directory, the OpenClaw setup script is executed. The script initiates the build process inside the Docker container. System-relevant dependencies and package managers such as bun, corepack, and pnpm are installed and configured in the process.
cd openclaw
docker-setup.sh
Configure OpenClaw
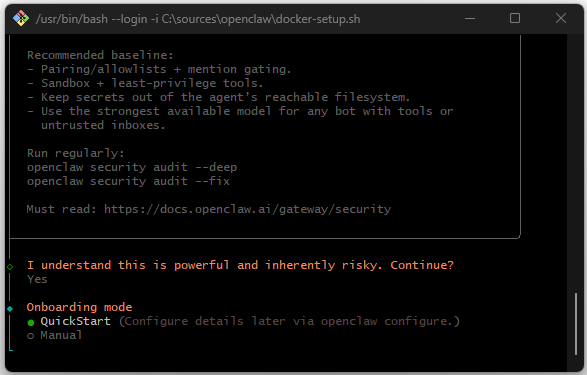
After the build process is complete, the interactive configuration mode starts. First, the security notices must be accepted because the agent can acquire extensive system privileges.

For a quick setup, the QuickStart mode is selected.
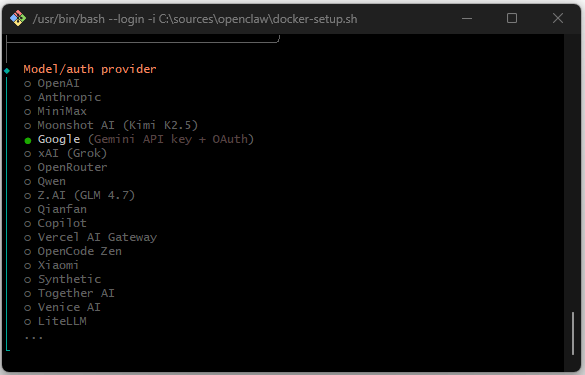
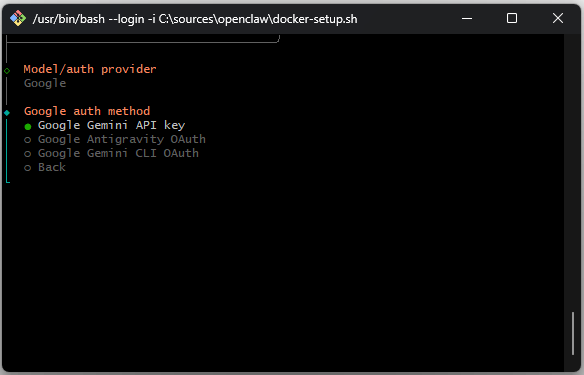
Provider selection: choosing Google as the provider.
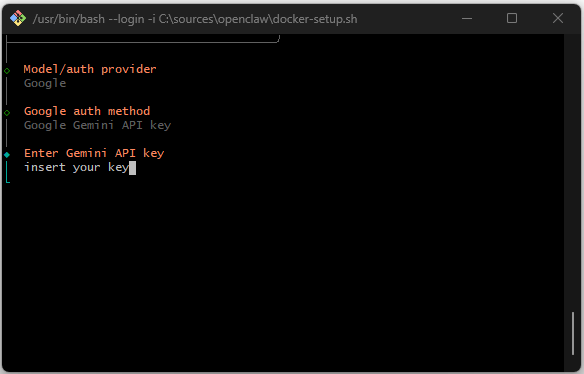
Authentication: entering the Gemini API key.
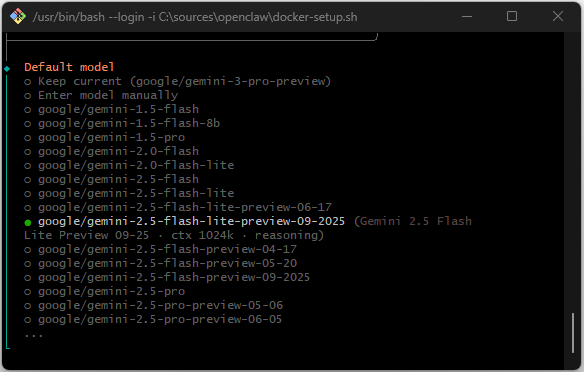
Model selection: defining the model to be used, for example google/gemini-2.0-flash.
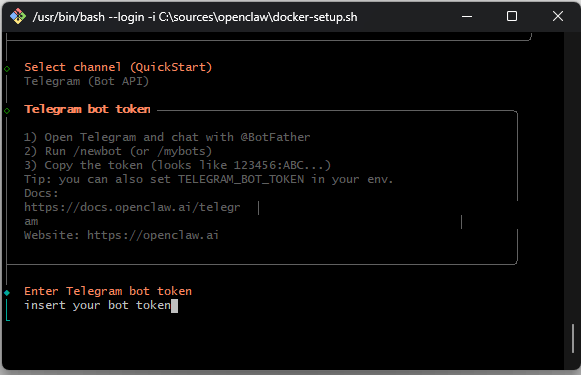
Integration of the Communication Interface
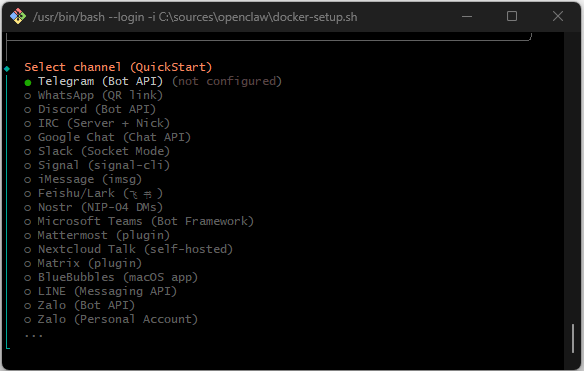
The system prompts to choose a primary communication channel. Here, Telegram (Bot API) is selected. The previously generated Telegram bot token must be entered into the console at this point.
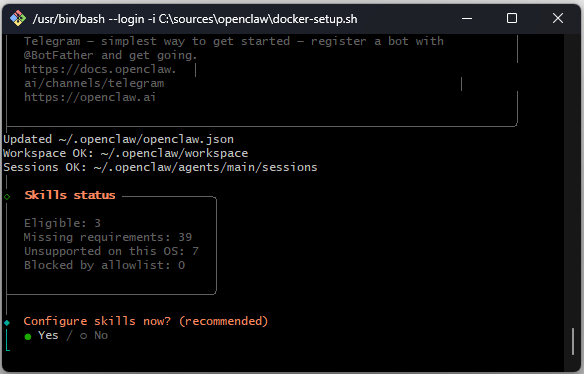
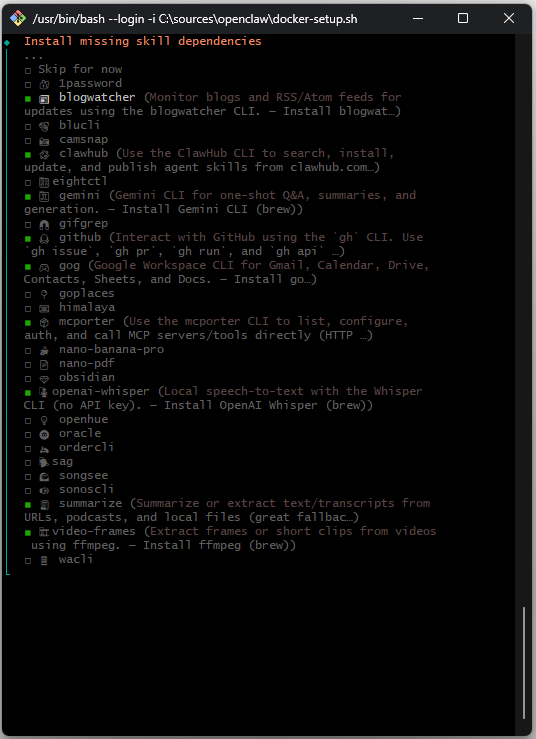
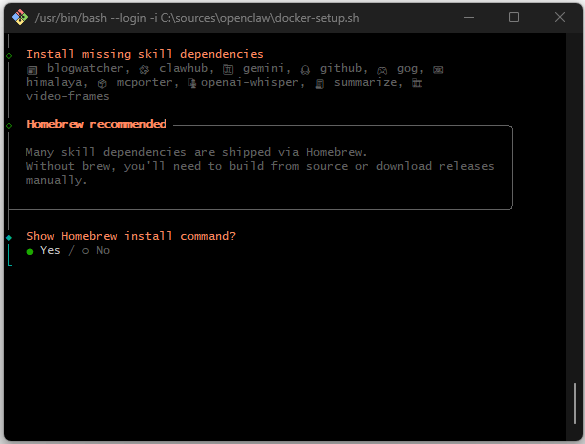
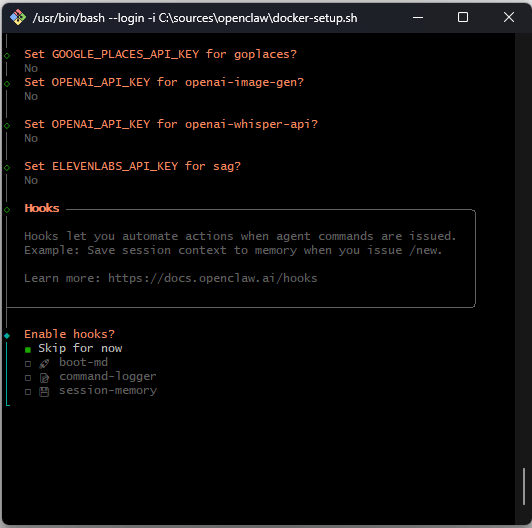
Setting Up Skills and Dependencies
OpenClaw checks the status of available extensions (“skills”). The system lists missing dependencies for modules such as github, openai-whisper, or gog (Google Workspace). To resolve these dependencies, the installation of Homebrew within the environment is offered and confirmed.
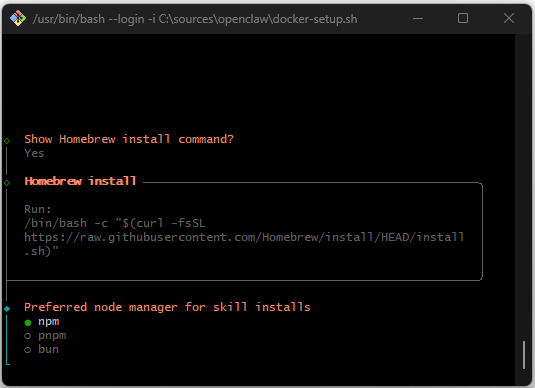
Optional API keys for services like Google Places or ElevenLabs can be skipped in this step.
Completion and System Start
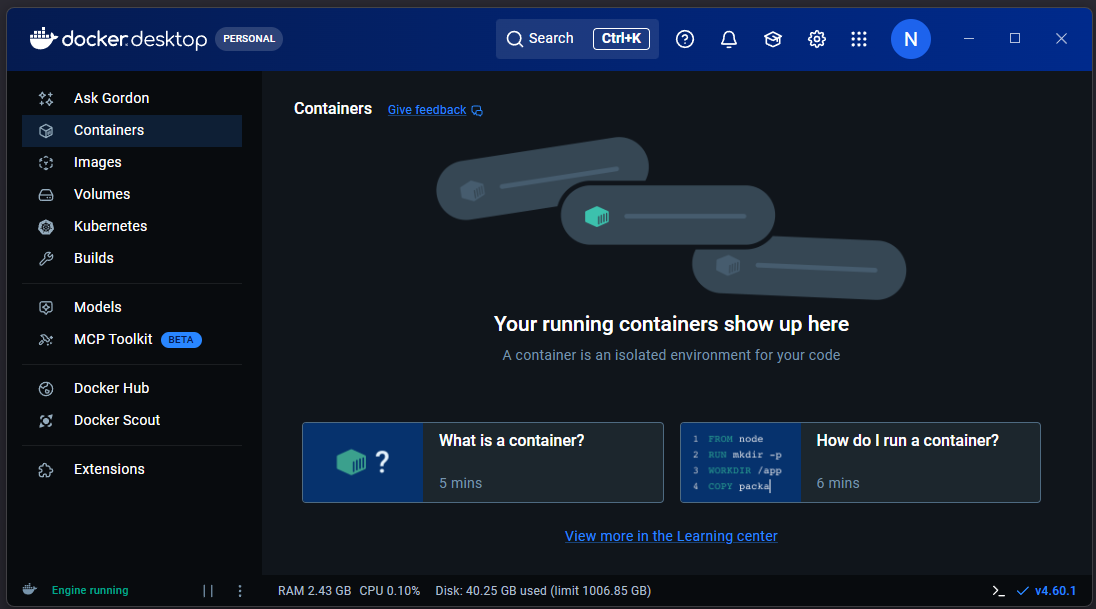
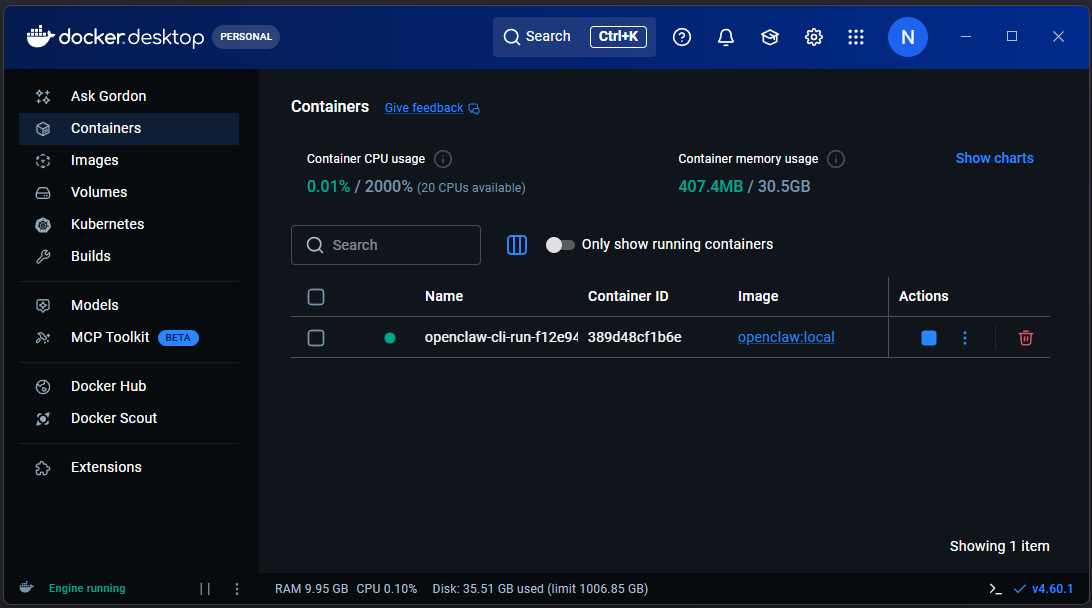
After successful configuration, the system outputs the local address of the web interface. At this point, the openclaw-cli-run container is active in Docker Desktop.
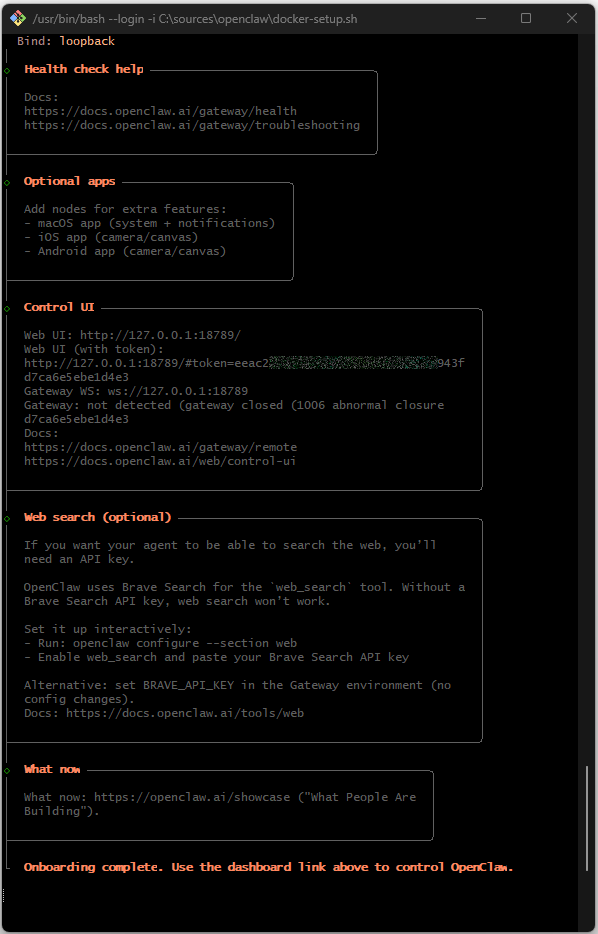
The OpenClaw GUI is not displayed at the specified URL at first., although the container is now ready.
http://127.0.0.1:18789/#token=eeac2ff0d......4e3
We therefore first close the console with Ctrl+C.
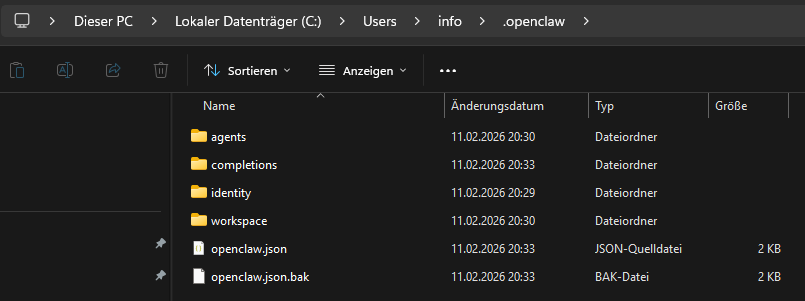
OpenClaw Configuration
After installation, the configuration can be found here.
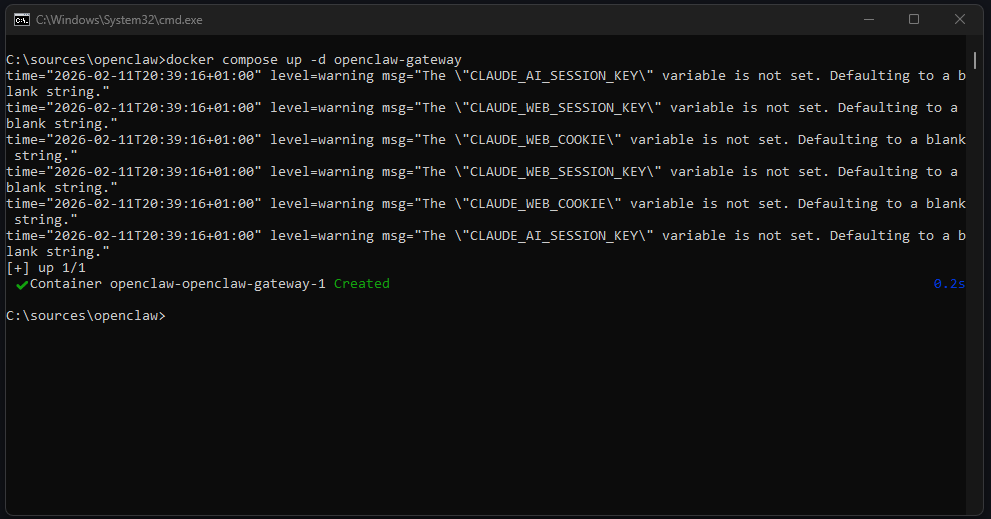
Restart OpenClaw
To start the service fully, execute the following command:
docker compose up -d openclaw-gateway
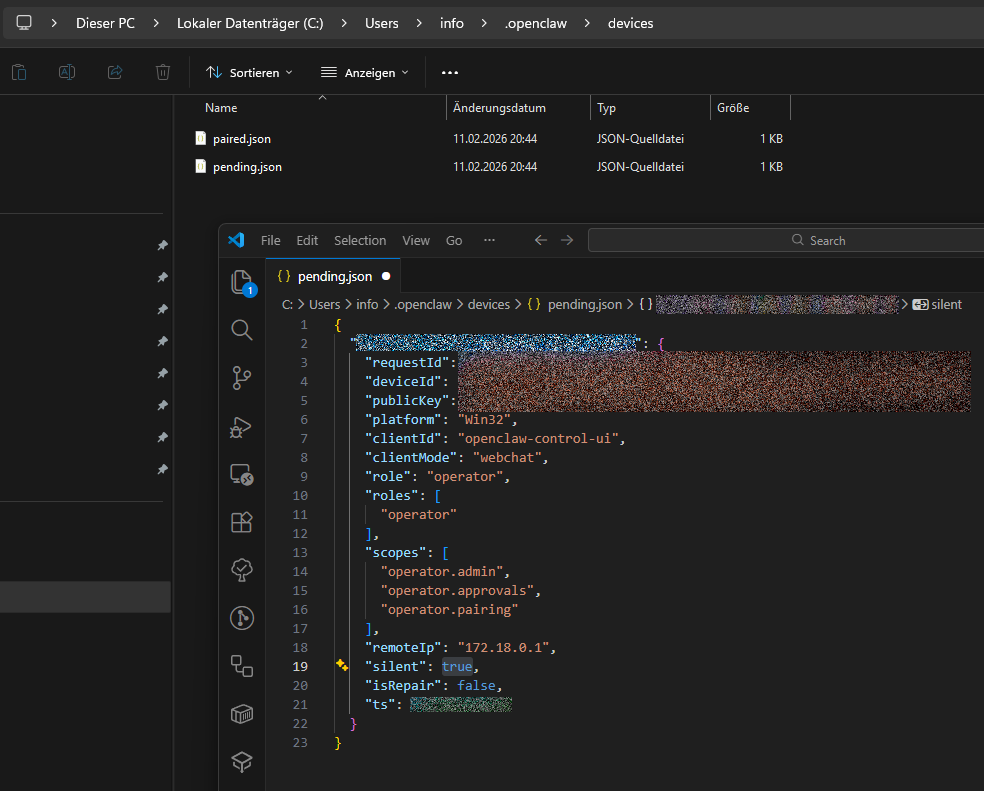
Afterwards, the OpenClaw GUI can be reached at the previously specified URL. If the web interface shows the status “Disconnected”, a manual adjustment of the configuration file is necessary.
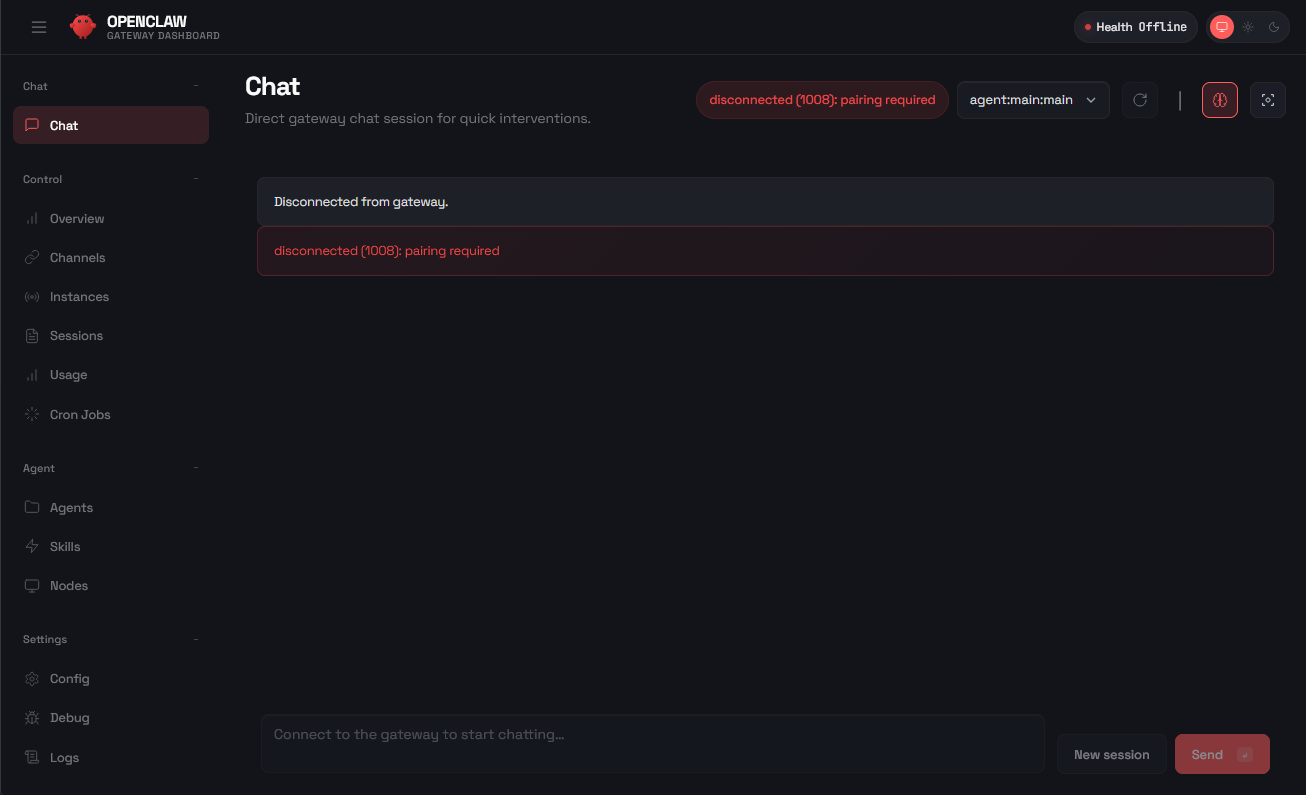
The file pending.json is located in the directory C:\Users[User].openclaw\devices. In this JSON file, the parameter “silent” must be manually changed from false to true. pending.json is only created after we have accessed the URL specified earlier.
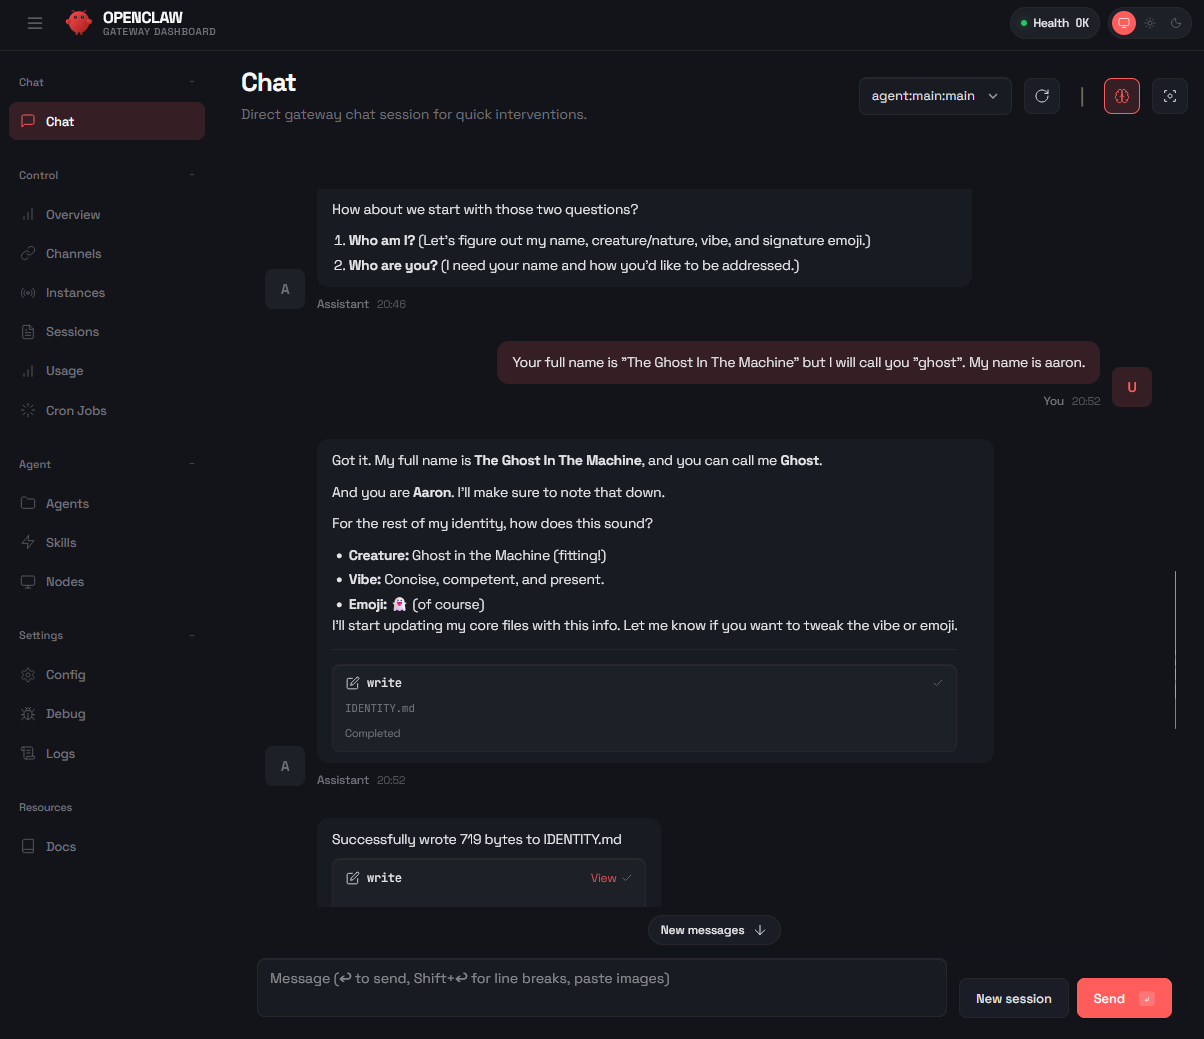
Chat with OpenClaw via the GUI
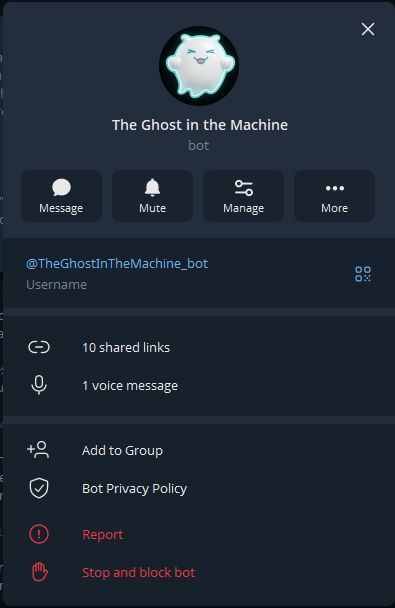
After reloading the web interface, the agent’s identity can be defined (e.g. Name: “The Ghost in the Machine”).
Launch OpenClaw via the Console
In case we want to make changes, e.g. install additional skills, we can launch the OpenClaw console inside the Docker container as follows.
docker exec -it openclaw-openclaw-gateway-1 /bin/bash
Telegram
Actually, the bot should report itself via Telegram after starting OpenClaw. For me, there was no reaction from Telegram, which is why I had to invoke the onboarding again to configure Telegram anew.
We can start the onboarding via the OpenClaw CLI.
docker compose run --rm openclaw-cli onboard
After starting the container infrastructure, the bot is indeed online but rejects interactions by default. The system reports “OpenClaw: access not configured” and displays the associated Telegram User ID and Pairing ID.
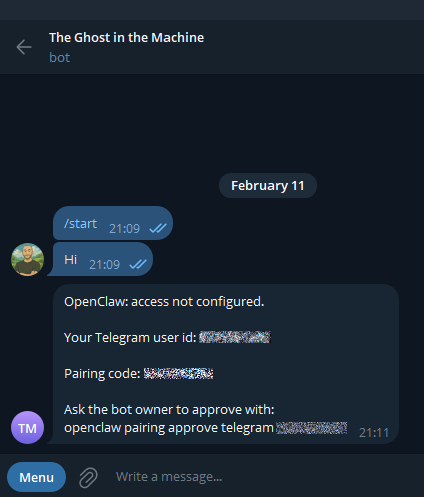
This is a security mechanism to prevent unauthorized access to the agent. To enable communication for your own account, this ID must be explicitly approved. This is done by executing the following command in the command prompt, replacing [TELEGRAM_BINDING_ID] with the binding ID displayed in the chat:
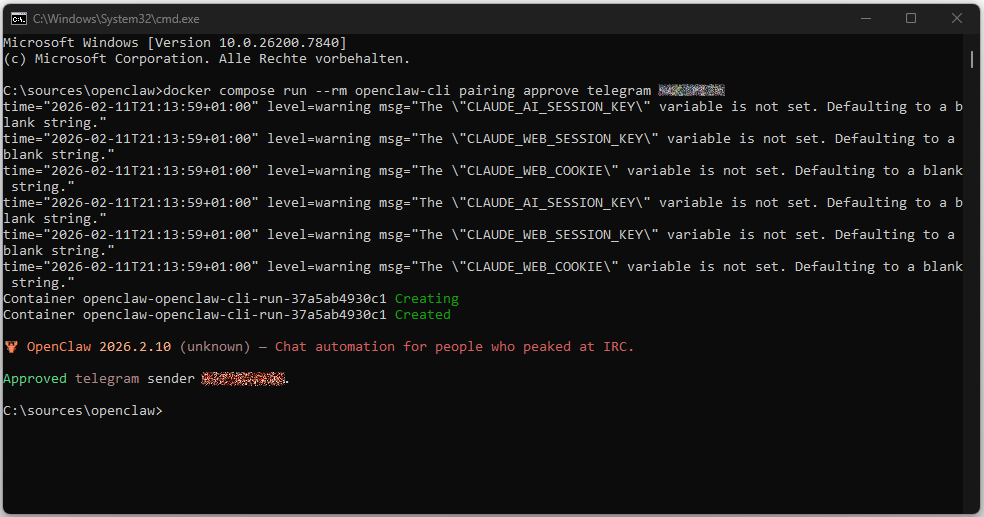
docker compose run --rm openclaw-cli pairing approve telegram TELEGRAM_BINDING_ID
The console confirms the operation with the message “Approved telegram sender”. Immediately afterwards, the bot is enabled for this user and processes incoming messages.
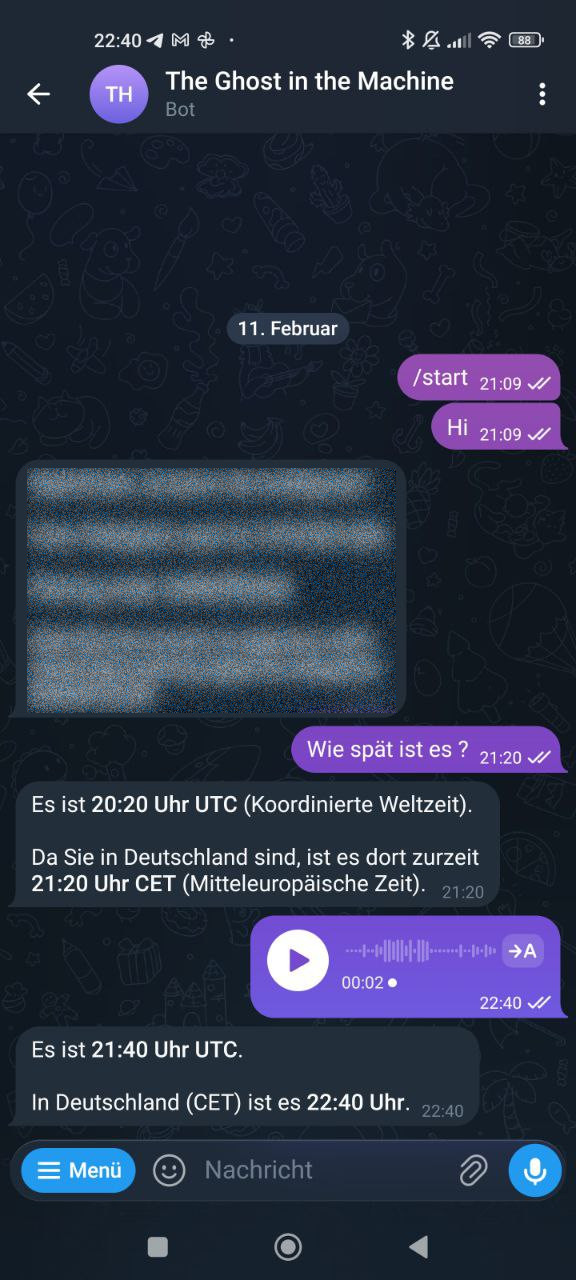
After authorization, the bot is ready for use. It responds to inputs in the Telegram chat and can process and output context-related information, such as the current time taking into account the time zone (CET).
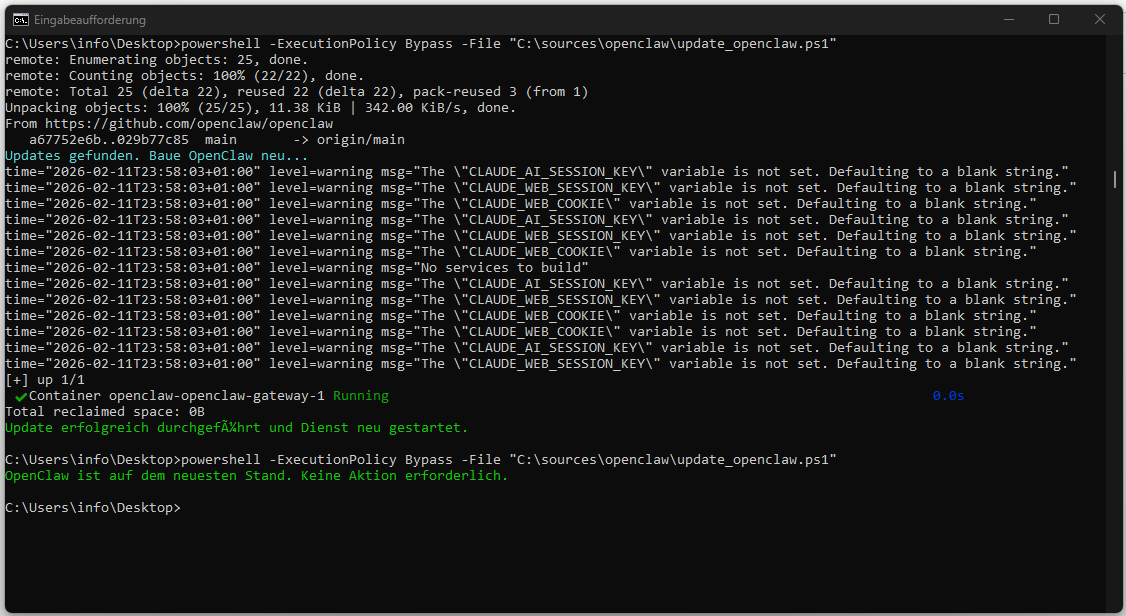
OpenClaw Auto-Update
Anyone running OpenClaw locally via Docker (local build) does not want to manually run git pull and docker compose build every time to stay up to date.
Create a new file named update_openclaw.ps1 in the root directory of your OpenClaw installation (e.g. C:\sources\openclaw).
# Als normaler User in C:\sources\openclaw\

# 1. Neueste Infos vom Server holen ohne zu mergen
git fetch origin

# 2. Prüfen, ob der lokale Stand hinter dem Server liegt
$local = git rev-parse HEAD
$remote = git rev-parse origin/main

if ($local -ne $remote) {
    Write-Host "Updates gefunden. Folgende Dateien werden aktualisiert:" -ForegroundColor Cyan

    # Zeige die Dateien an, die sich ändern werden
    git diff --name-only $local $remote

    # Jetzt den eigentlichen Pull und Build durchführen
    git pull origin main

    # Hier folgen deine bestehenden Docker-Befehle...
    docker-compose up -d --build

    Write-Host "Update erfolgreich durchgeführt." -ForegroundColor Green
}
else {
    Write-Host "OpenClaw ist auf dem neuesten Stand. Keine Aktion erforderlich." -ForegroundColor Gray
}
OpenClaw can then be updated with the following command:
powershell -ExecutionPolicy Bypass -File "C:\sources\openclaw\update_openclaw.ps1"